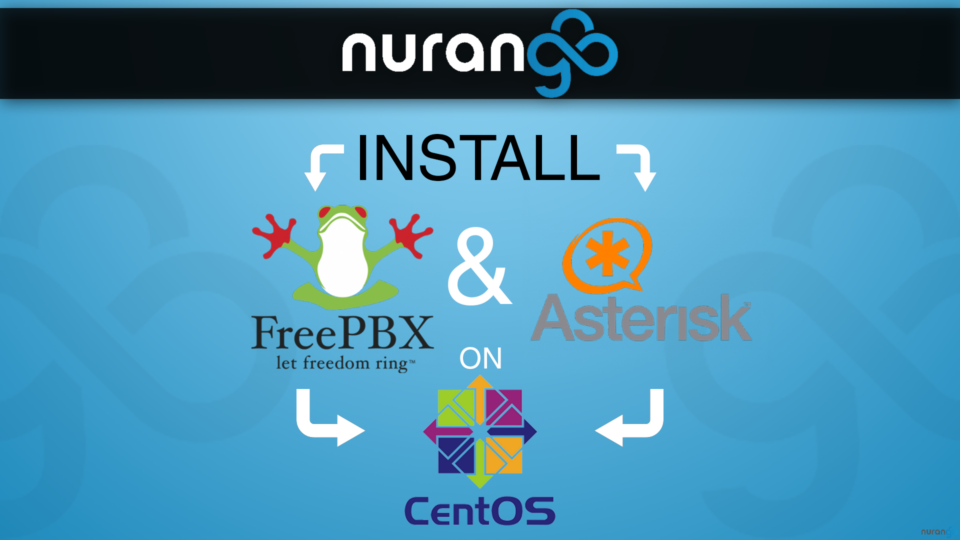
asterisk combined with FreePBX is a robust and feature rich IP-PBX that is used in small and large scale deployments. It can scale up with little to no effort and can be easily clustered for redundancy and larger capacity needs. Combined with the power of Linux – CentOS7 in this case, you can maintain, secure and integrate with almost anything.
While FreePBX offers both Stand-alone and an All-in-one Linux/asterisk/FPBX versions, this post is for the brave souls that prefer a manual approach. This will be the case if you are installing in a Cloud environment and don’t have physical access to the machine.
Watch the walk-through of this installation on our Youtube channel.
With introductions out of the way, let’s take a look at the packages that we’re using;
- VPS with CentOS 7
- asterisk v16
- FreePBX v14
- PJSIP v2.8
OS Pre-requisites
Assuming a new installation, let’s first make sure SELinux is disabled;
sestatus

If not,
sed -i 's/SELINUX=enforcing/SELINUX=disabled/g' /etc/selinux/config
reboot
Make sure we’re up-to date;
sudo yum -y update
reboot
Installing asterisk 16
Install dependency packages;
sudo yum -y install epel-release gcc-c++ ncurses-devel libxml2-devel wget openssl-devel newt-devel kernel-devel-uname -r sqlite-devel libuuid-devel gtk2-devel jansson-devel binutils-devel bzip2 patch libedit libedit-devel tftp-server \
   ncurses-devel sendmail sendmail-cf sox newt-devel libxml2-devel libtiff-devel \
   audiofile-devel gtk2-devel subversion kernel-devel git crontabs cronie \
   cronie-anacron wget vim nano uuid-devel sqlite-devel net-tools
Add asterisk Firewall rules – This is optional and can be done later as well;
sudo firewall-cmd --zone=public --permanent --add-service={sip,sips}
sudo firewall-cmd --zone=public --permanent --add-port=10000-20000/udp
sudo firewall-cmd --zone=public --permanent --add-port=4569/udp
Verify: sudo firewall-cmd --permanent --list-services
sudo firewall-cmd --permanent --list-ports
Build and Compile asterisk:
mkdir ~/build-asterisk
cd ~/build-asterisk
Build PJSIP;
PJSIP is a SIP Protocol stack that seems poised to replace ChanSIP as the primary SIP driver in asterisk. Although I have had several issues using PJSIP and prefer ChanSIP configurations and commands, my personal needs will likely not influence the direction 😀 .. It does appear to be more robust than Chan, but not as polished just yet. You will also need to learn the new operators as the differ from the more familiar asterisk CLI commands. Read the list here.
More about PJSIPs technology here: https://www.pjsip.org/sip_media_features.htm
Let’s grab PJSIP, compile the flags and build it into the asterisk directory;wget https://www.pjsip.org/release/2.8/pjproject-2.8.tar.bz2
tar -jxvf pjproject-2.8.tar.bz2
cd pjproject-2.8
Config options:./configure CFLAGS="-DNDEBUG -DPJ_HAS_IPV6=1" --prefix=/usr --libdir=/usr/lib64 --enable-shared --disable-video --disable-sound --disable-opencore-amr
Build dependencies:make dep
Build:make
Install:sudo make install
sudo ldconfig
Building asterisk;
Back to our build directory;cd ~/build-asterisk
Download:wget http://downloads.asterisk.org/pub/telephony/asterisk/asterisk-16-current.tar.gz
Extract:
tar -zxvf asterisk-16-current.tar.gz
Enter dir:cd asterisk-16.X.X
Enable MP3 Support (for MoH, recordings, etc);
sudo yum install svn
contrib/scripts/get_mp3_source.sh
Configure and Build./configure --libdir=/usr/lib64 --with-jansson-bundled
We now need to enable the MP3 support flag inside of the asterisk Add-ons list to compile;
make menuselect
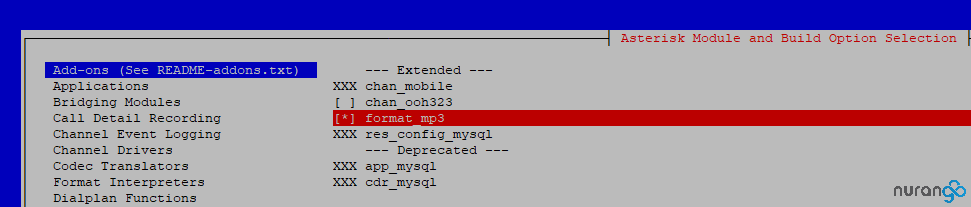
Save & Exit
Finish up by building, compiling and generating the sample configs in /etc/asterisk/. Then ensure asterisk starts up at boot.make
make install
make samples
make config
Congrats! You have a working version of asterisk 16! If you’re not installing FreepBX, you can fire up asterisk and start configuring – systemctl start asterisk
For the rest of us, let’s move onward.
Installing FreePBX 14
At the time of this article, the FreePBX road-map on their own wiki seems to be outdated and unclear as to EOL on specific versions. That said, v14 seems to be the preferred Stable release and is used by their pre-compiled packages. We don’t much care about this since luckily FreePBX includes an auto update feature for it’s core inside the UI.
Install dependency source;rpm -Uvh https://mirror.webtatic.com/yum/el7/epel-release.rpm
For some very questionable reason, CentOS still comes with PHP 5.4. We need to enable the repo for 5.6 (although this is not ideal either, I will test with later versions and update).
rpm -Uvh https://mirror.webtatic.com/yum/el7/webtatic-release.rpm
Install dependencies:
sudo yum install -y php56w php56w-opcache php56w-xml php56w-mcrypt php56w-gd php56w-devel php56w-mysql php56w-intl php56w-mbstring php56w-pear php56w-process mariadb-server mariadb httpd gnutls-devel unixODBC mysql-connector-odbc
Install a legacy component:pear install Console_Getopt
Optionally setup our Web access firewall rules:firewall-cmd --zone=public --add-port=443/tcp --permanent
firewall-cmd --reload
Enable MariaDB and Apache at startup:systemctl enable mariadb.service
systemctl enable httpd.service
Start-up Maria:systemctl start mariadb
Run the mysql configuration script – Do NOT set a root password on the DB as the FreePBX install script will do this for us.mysql_secure_installation
Create our asterisk user and group:adduser asterisk -m -c "Asterisk User"
Set permissions on files and folders:chown asterisk. /var/run/asterisk
chown -R asterisk. /etc/asterisk
chown -R asterisk. /var/{lib,log,spool}/asterisk
chown -R asterisk. /usr/lib64/asterisk
chown -R asterisk. /var/www/
Modify Apache:
sed -i 's/(^upload_max_filesize = )./\120M/' /etc/php.ini sed -i 's/^(User|Group)./\1 asterisk/' /etc/httpd/conf/httpd.conf
sed -i 's/AllowOverride None/AllowOverride All/' /etc/httpd/conf/httpd.conf
Start Apache:systemctl start httpd.service
Finally, download FreePBX and install;
cd /usr/src
wget http://mirror.freepbx.org/modules/packages/freepbx/freepbx-14.0-latest.tgz
tar xfz freepbx-14.0-latest.tgz
rm -f freepbx-14.0-latest.tgz
cd freepbx
Use the FPBX script to start asterisk:./start_asterisk start
Run the installer:./install -n
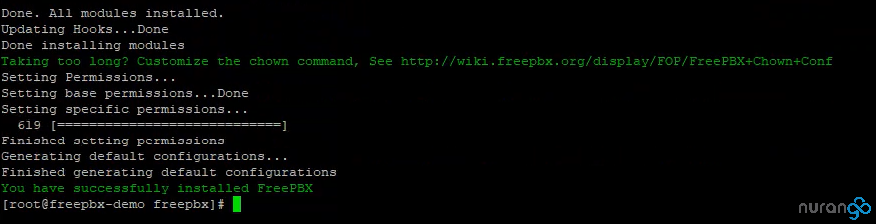
That should do it! We can complete the setup by accessing the UI through the web browser. Don’t forget to disable firewalld if you need to gain temporary access and have not set your rules – systemctl stop firewalld
Now switch to your browser and navigate to your boxes IP.
Configure admin user details and update settings;
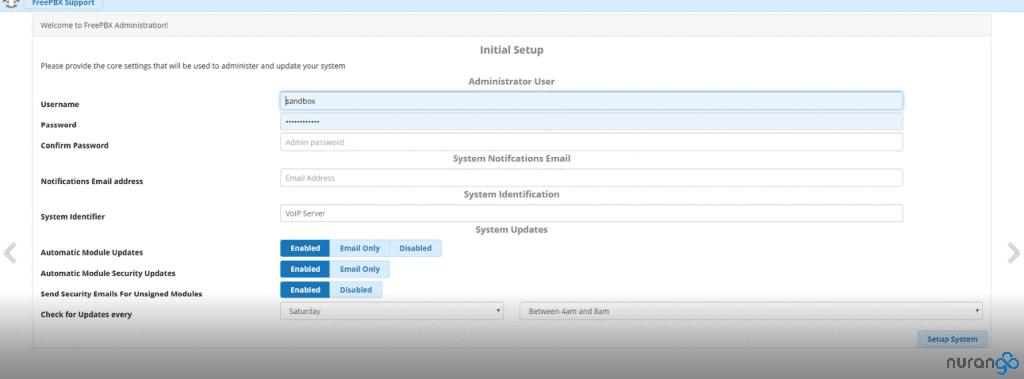
Notifications: Used to send admin emails regarding updates available or that were auto installed, as well as if any modules have been modified. Modified files indicate an intruder may have gained access to your system and changed some FPBX config files.
Auto Updates: This has worked well in my experience but if you want to maintain control and test updates before deploying, disable auto-updates.
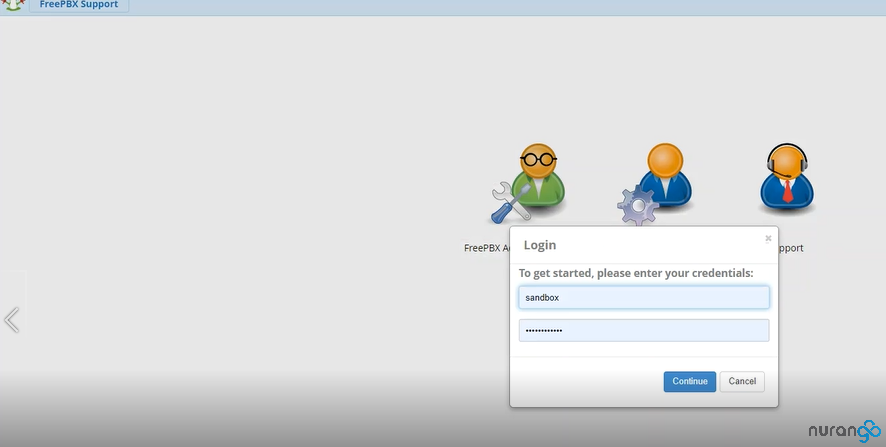
You will now be prompted to login with your new user;
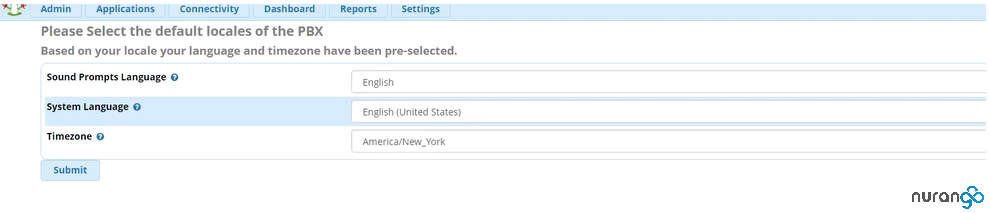
Timezone and language settings:
FreePBX will finish loading the dashboard and initial configs. When that’s done, complete the setup by pressing the big red “Apply config” button.

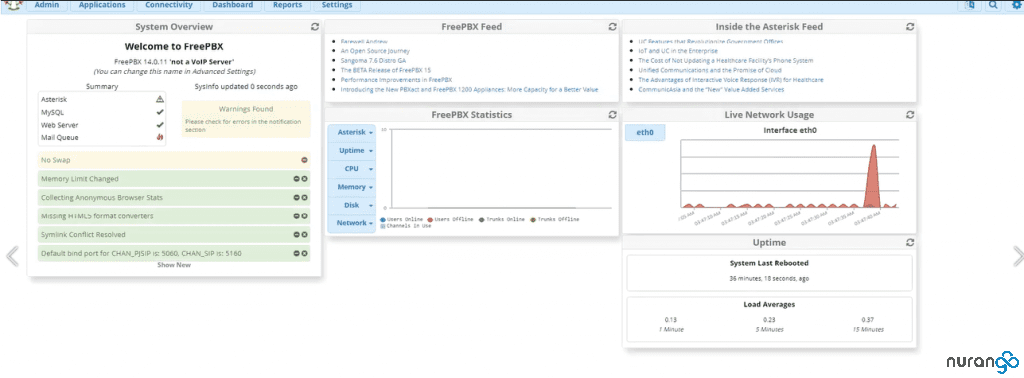
“Oila!” You’re ready to start setting up your shiny new phone system 😀
Tip: Don’t forget to setup NAT and Firewall rules under “Settings” if applicable.
I hope this was helpful as it took some time to figure out! If you have any comments or suggestions, please post them down below.
Prefer a hosted VoIP system solution? Check-out our Business VoIP plans.